If you are managing your customer's product onboarding and satisfaction, then you know how effective it would be if you could create content that was super personal and customised to fit the individual customer needs. However, today you are creating content with generic information regardless of who your customer is. You do this because you can't differentiate between customers and because it takes too long time. Today, we are solving these challenges for you with a set of features that help you create personalized content at scale.
How to create personalized content
As part of our efforts of helping you create content that is tailored specifically to an individual customer at scale, we are introduced Variables. Besides, we are releasing Link to Topic commands, seven new admonition types and few Assistant enhancements.
Dynamic content Variables
During our last customer survey, we learned that 84% of customers do not get their needs covered with the conventional manuals. The reason behind this is that content:
is not provided digitally (more than 80% of customers would prefer digital instructions)
requires a lot of effort without clear benefits (around 69% of customers expect additional benefits)
does not provide any specific information about their purchase (about 76% of all customers would prefer purchase and ownership information to be recorded)
Creating content with a conventional output, will in the majority of the cases result in your content never being read, seen or obtained. With Product Assistants, we have solved the problems around how you can create and share digital content at scale. Today, we are also solving how you can dynamically add customer data to any piece of content using Variables.
With Variables, you can turn any piece of material into highly personal content as it allows you to generate content that contains customer-specific information. Moreover, instead of stating your the product or company name, again and again, you can save time by using Variables.

From today you can add Variables to your content from the following three categories:
Customer data
Product data
Workspace data
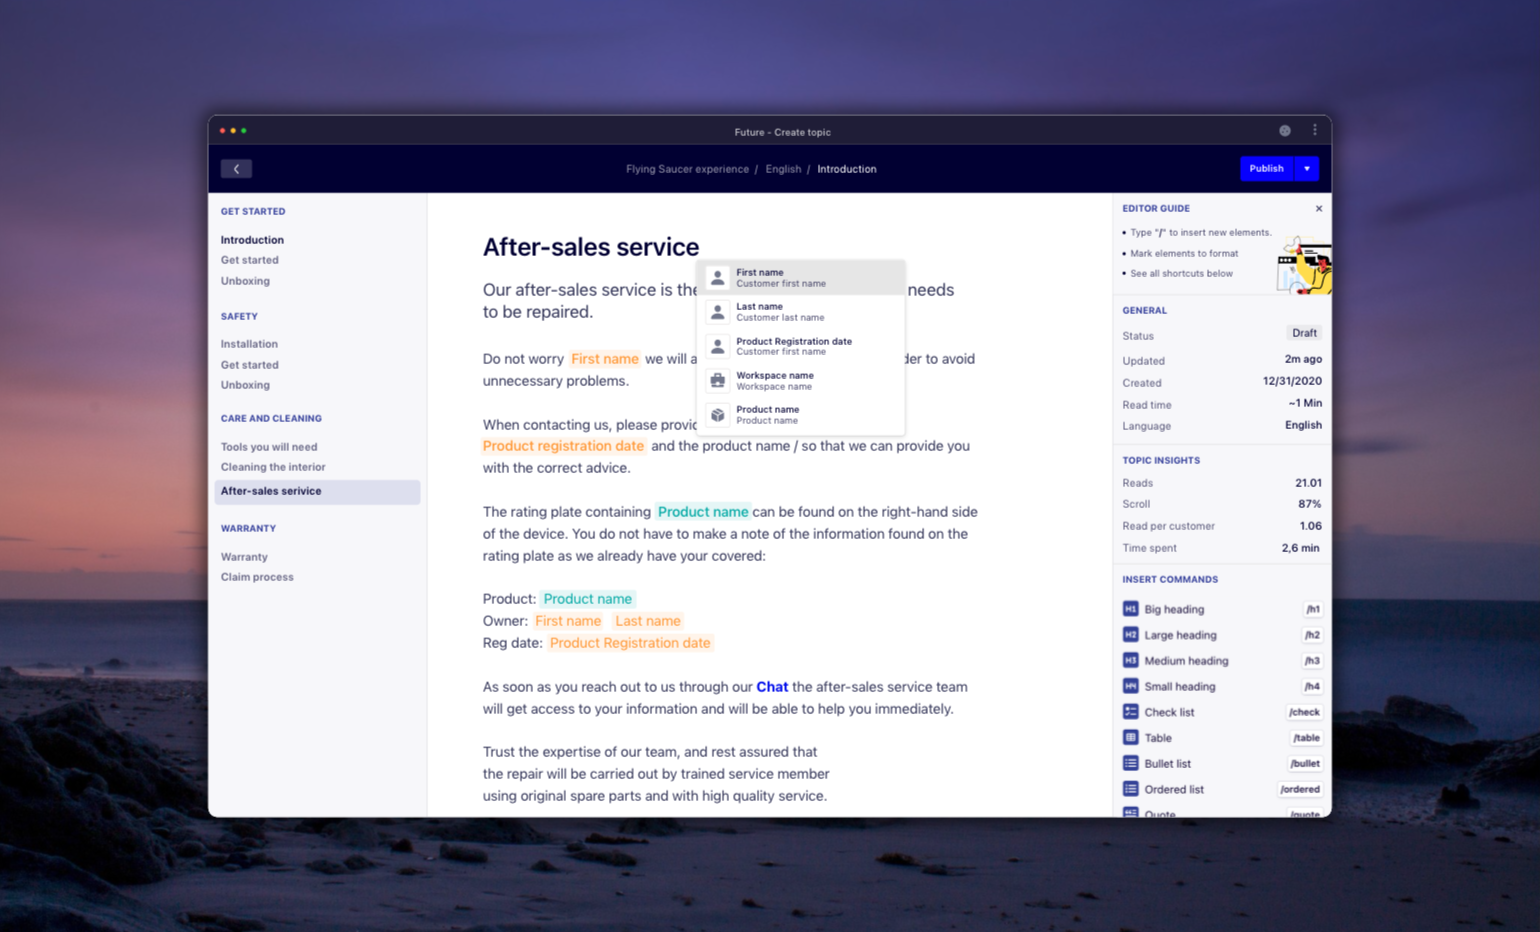
Using the "/" command you can easily search for a variable. As demonstrated above, as soon as you hit "/" in a sentence a variable menu will be shown from which you can select the variable you want to add. The below-listed Variables are available:
Customer first name
Customer last name
Product registration date
Workspace name
Product name
Create more with less work
Admonitions
We are constantly taking in feedback and adding new components to the editor. With this release, we are also introducing seven new admonition types.

With the new admonitions, you now have a large variety of options to provide the right standouts when creating your content. As stated above the new admonition types include Caution, Danger, Import, Note, Info Example and Question. All admonitions designed specifically to provide you with a sufficient amount of communication/warning options.
Link to Topic
Instead of you having to create a link the old-school way, where you have to find the link URL, copy the URL, paste the URL etc., we are today also releasing a super fast and easy way for you to add links to any of your Topics.

As demonstrated above, with the "/ + link to a Topic" command you can with ease add a link to an existing Topic.
Assistant enhancements
As the final enhancement for this release, we are updating the way Assistants can be installed on a customer device.

From today, customers can both install the Assistant by clicking on the Install button or by interacting with their device-specific install options.
Shortcuts
When the Assistant is installed on the device it is now possible to create shortcuts to i.e. Profile, Search or even Chat.

As demonstrated above to add one or multiple shortcuts long press on the Assistant and select the shortcut. From here the shortcut can be added to the desired destination.
Thank you for your support!
All features covered in this release is already rolled out and is available in your account. Moreover, all features will be available for all marketed plans.
As always, do not hesitate to reach out to us if you have any questions or need a helping hand.
Learn how to collect valuable insights on your customers to sell even more.

We’re excited to announce that Layerise will be speaking at the upcoming LOOP Forum event

Layerise is excited to announce our participation in CENELEC - JTC 24


